Please follow the instructions below to setup your authentication methods
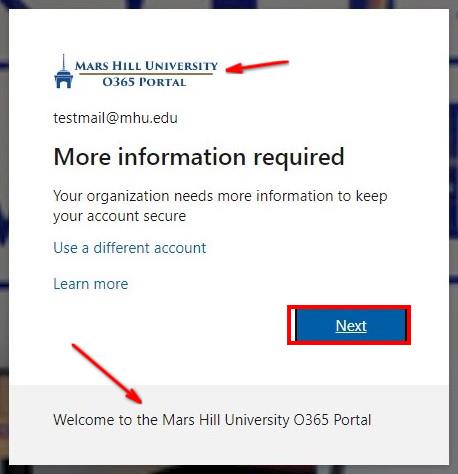
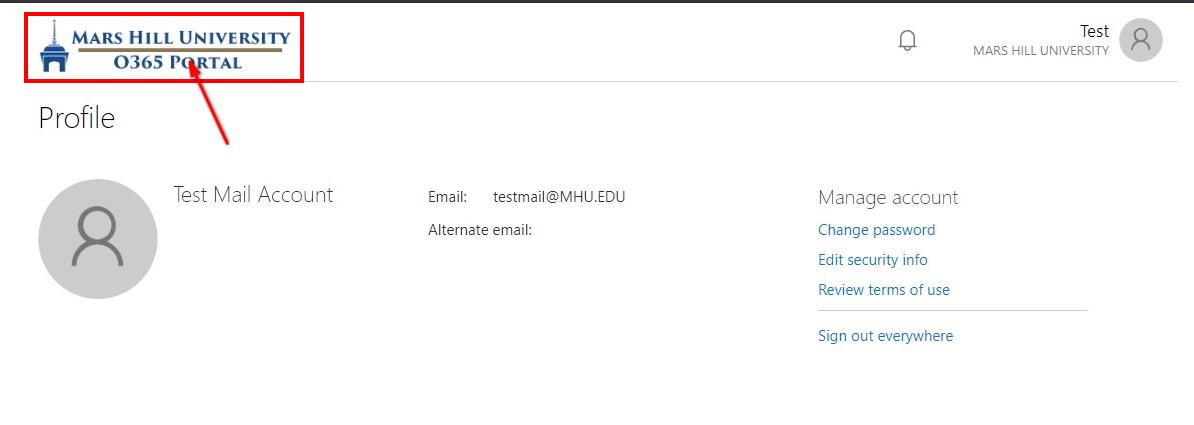
When you log into Microsoft Office 365 you will be prompted to provide additional security information. You can verify it is the MHU portal by the top logo and welcome banner at the bottom. (Note: You may also follow this link to complete the steps setup and modify your authentication methods: Register here)
- Click the “Next” button to get started.
You must complete at least two security information methods.
At this time the Microsoft Authenticator app, cell phone and alternate email are the supported authentication methods. While an alternate email is supported for password resets it is not supported for Multi-Factor Authentication. Therefore, you MUST configure either the Microsoft Authenticator App or a cell phone as one (or both) of your authentication methods.
Use the links below to jump directly to each authentication method instructions:
Microsoft Authenticator
Mobile Phone
Alternate EMail (does not work with MFA)
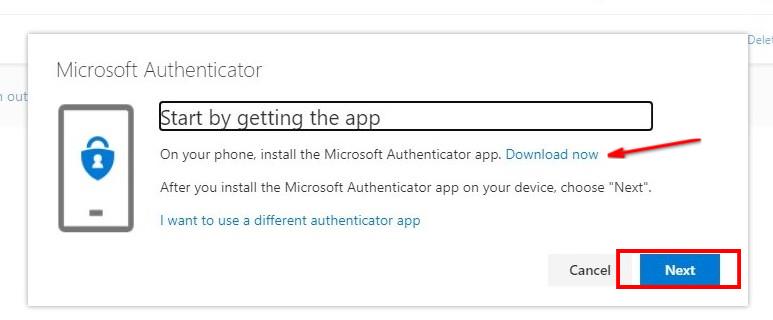
Microsoft Authenticator Authentication Method:
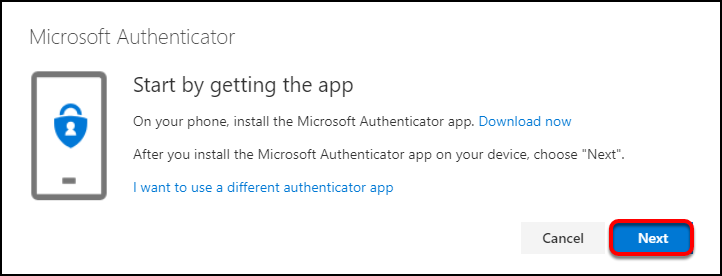
1. Click the “Download now” link and follow the instructions to install the Microsoft Authenticator app on your device.
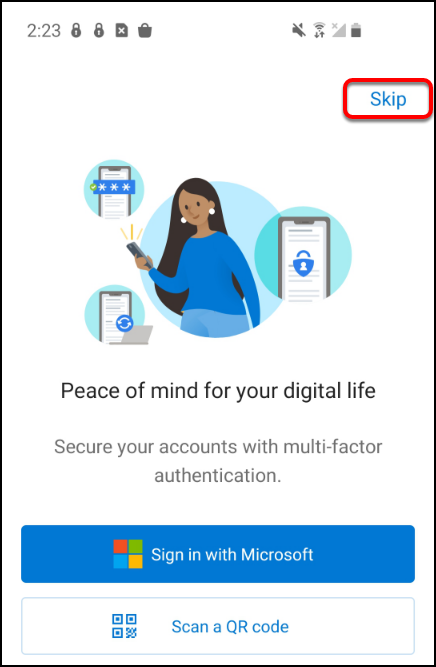
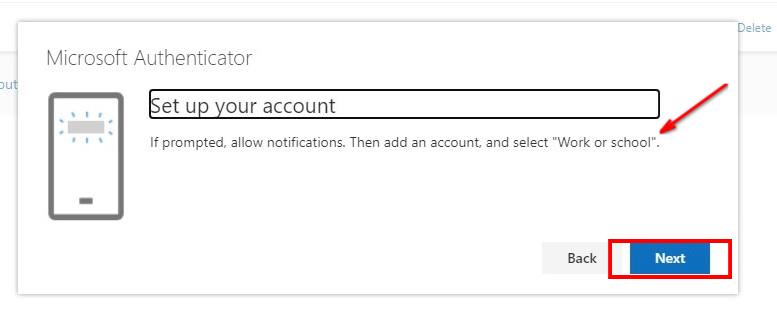
2. Open the Microsoft Authenticator app on your mobile device. If you see the “peace of mind” screen, tap Skip.
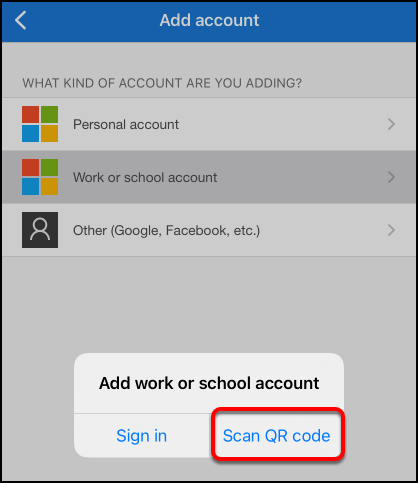
3. Tap Add account or the plus sign icon at the top right.
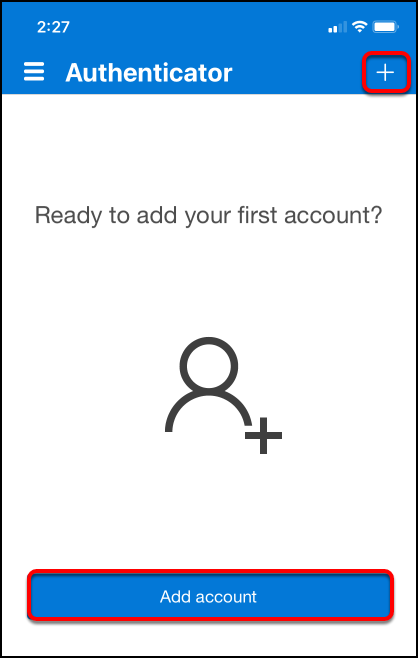
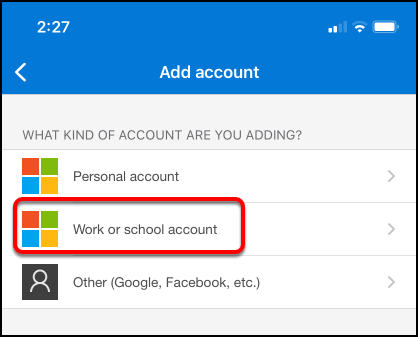
4. Tap Work or school account.
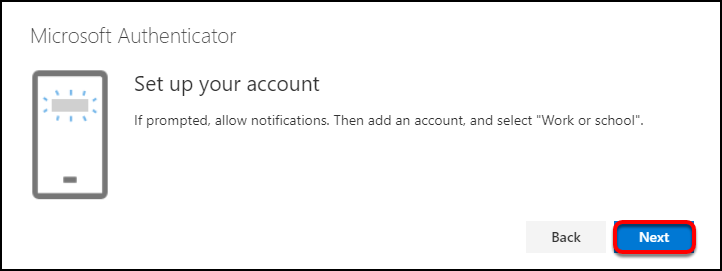
5. Switch back to your computer/laptop, click Next in the Microsoft Authenticator mini-wizard.
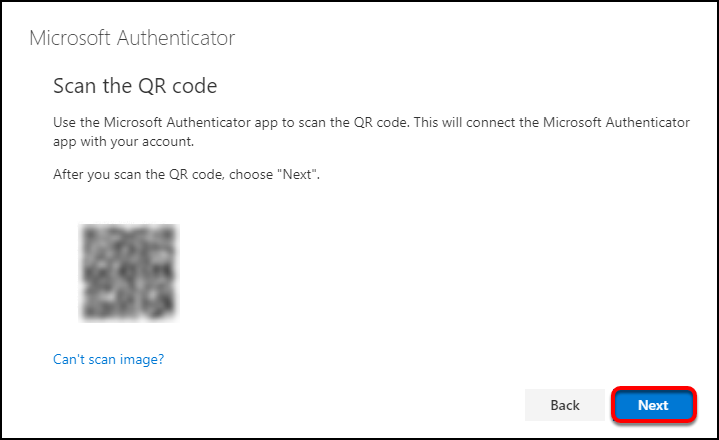
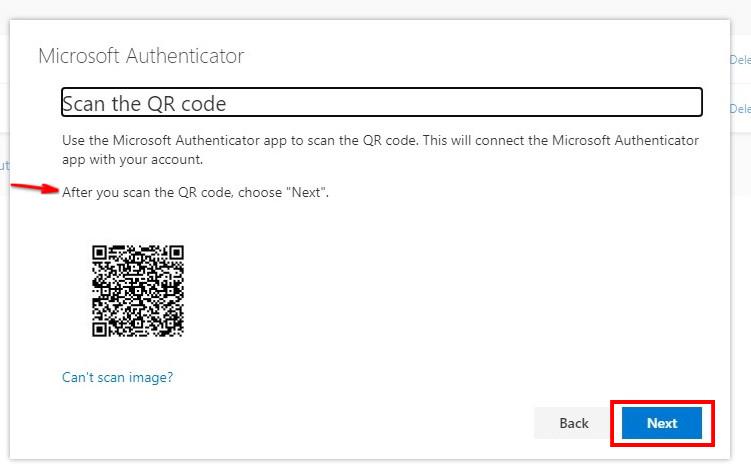
6. A QR code will pop up on your computer/laptop screen.
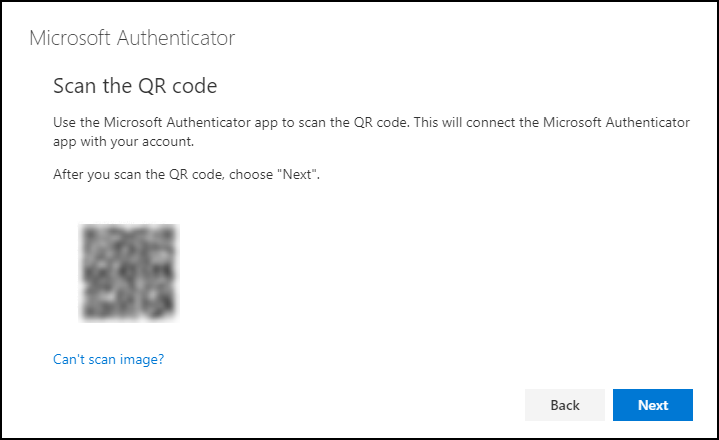
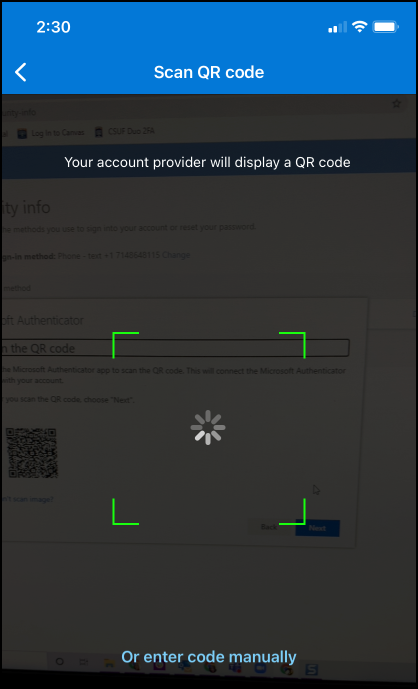
7. On your mobile device, choose Scan QR code.
You may need to allow Microsoft Authenticator to access your mobile device’s camera.
8. Hold your mobile device up to the computer/laptop screen to scan the QR code.
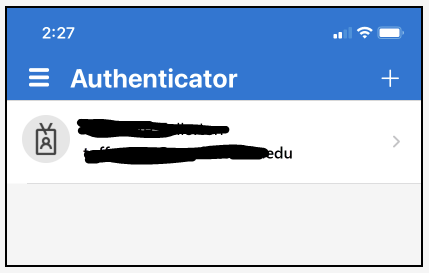
9. Your MHU account will now show up in Authenticator.
10. On your computer/laptop, click Next.
11. Microsoft Authenticator will now send a test notification to your mobile device.
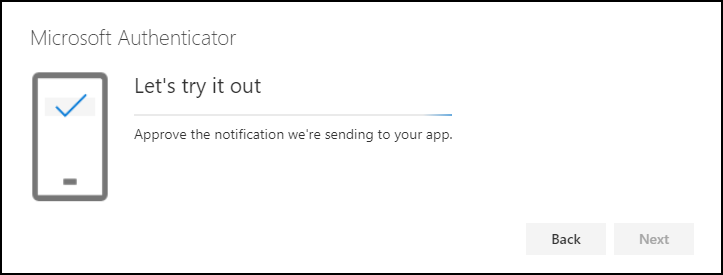
12. On your mobile device, tap Approve on the pop-up message in Microsoft Authenticator.
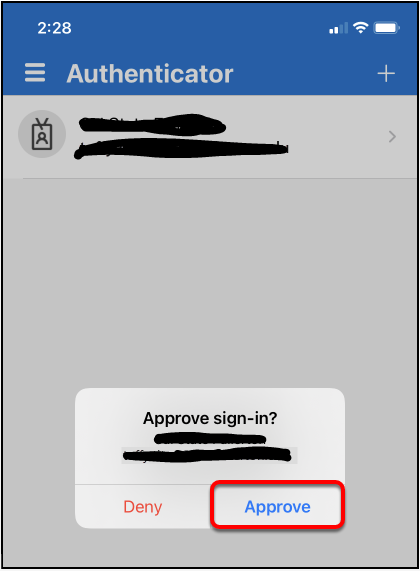
13. On your computer/laptop, click Next.
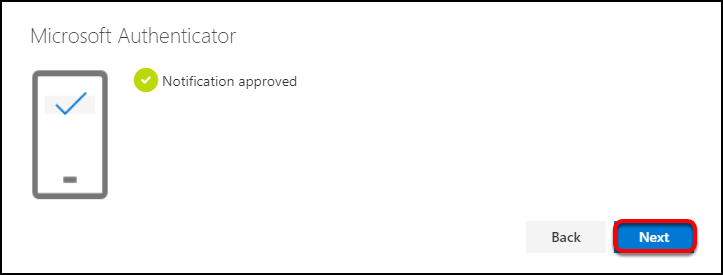
14. You’re done! If you want to make Microsoft Authenticator your default sign-in method, click Change and then select Microsoft Authenticator.
Mobile Phone Authentication Method:
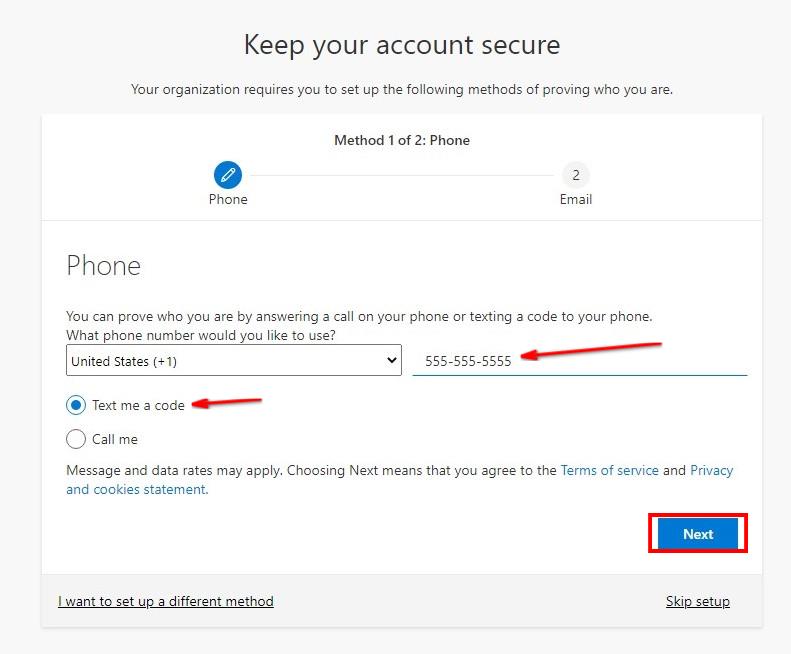
- Enter your cell phone number, make sure the “Text me a code” bubble is selected and then click the “Next” button.
Within a few seconds you will receive a text message on your cell phone with a verification code. Here is an example:
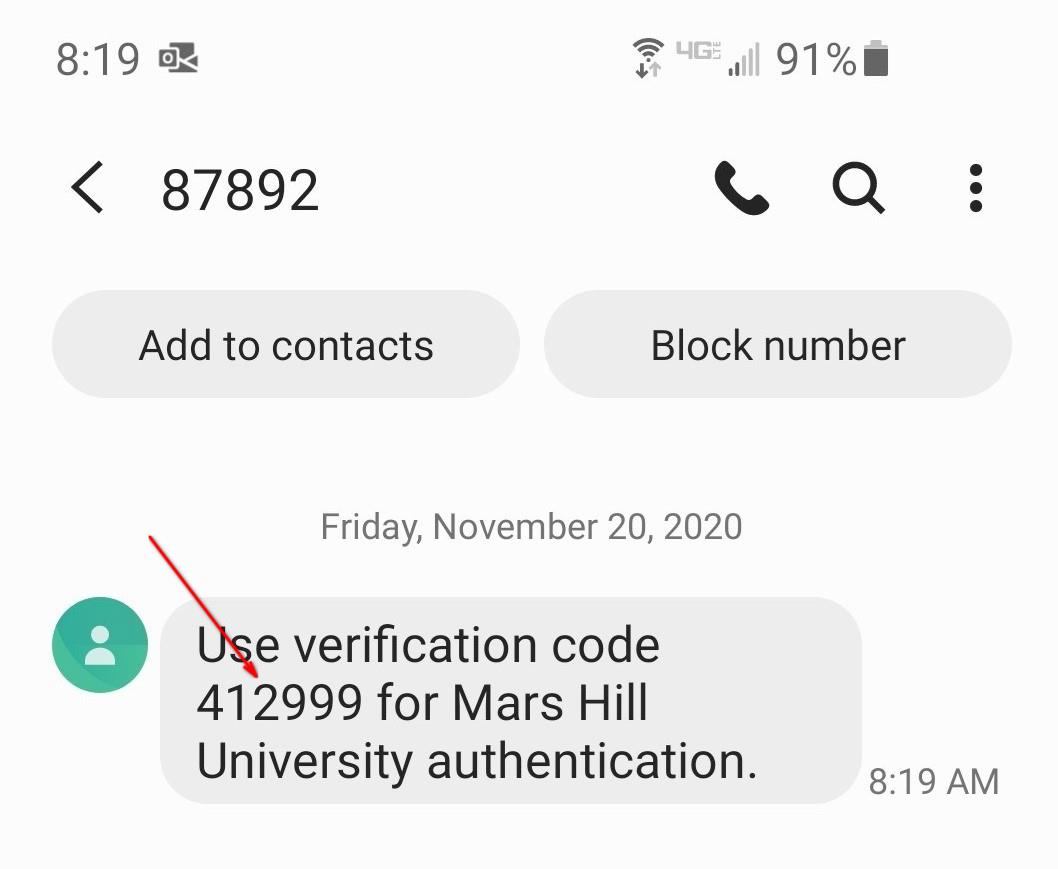
- Enter the verification code you received into the form and click the “Next” button to verify.
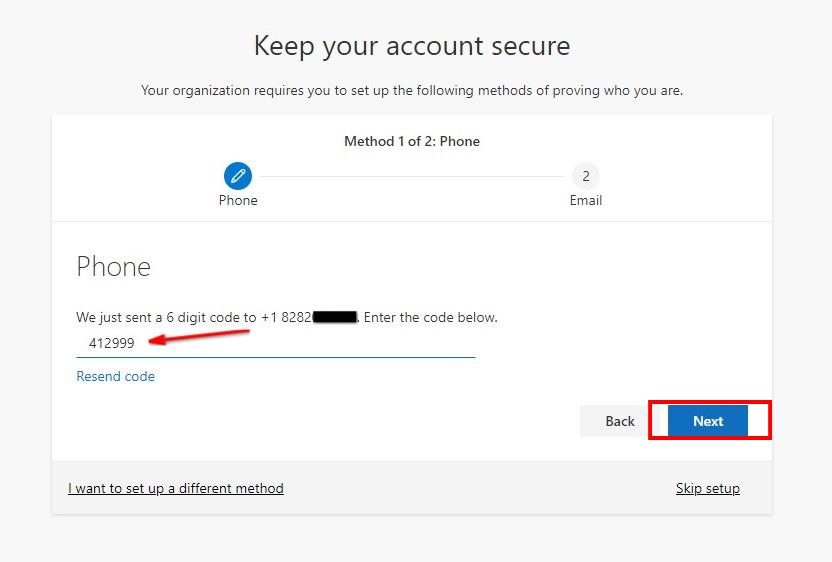
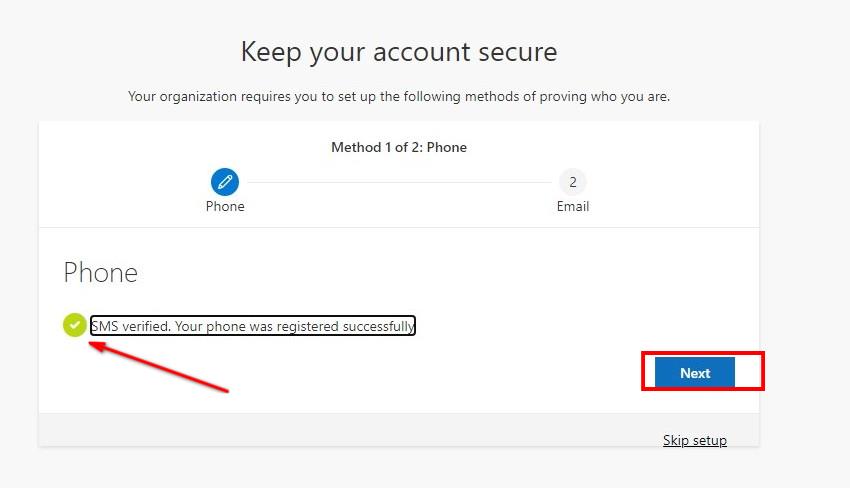
- If the codes match your phone is now configured and registered as an authentication method. Click “Next” to proceed to the next method.
Alternate Email Address Authentication Method (NOT SUPPORTED FOR MFA):
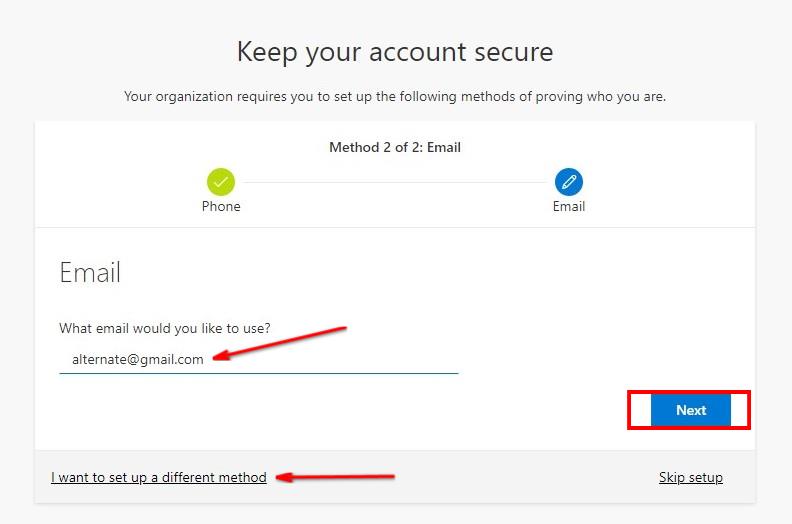
The next method is an alternate email address.
- Enter an alternate email address and click “Next“. This cannot be a MHU.EDU email address.
- Note: If you don’t have an alternate email address you may select the “I want to set up a different method” and select “Security questions” (Configuring security questions is covered later in this guide.)
You will receive an email like the one below with a verification code.
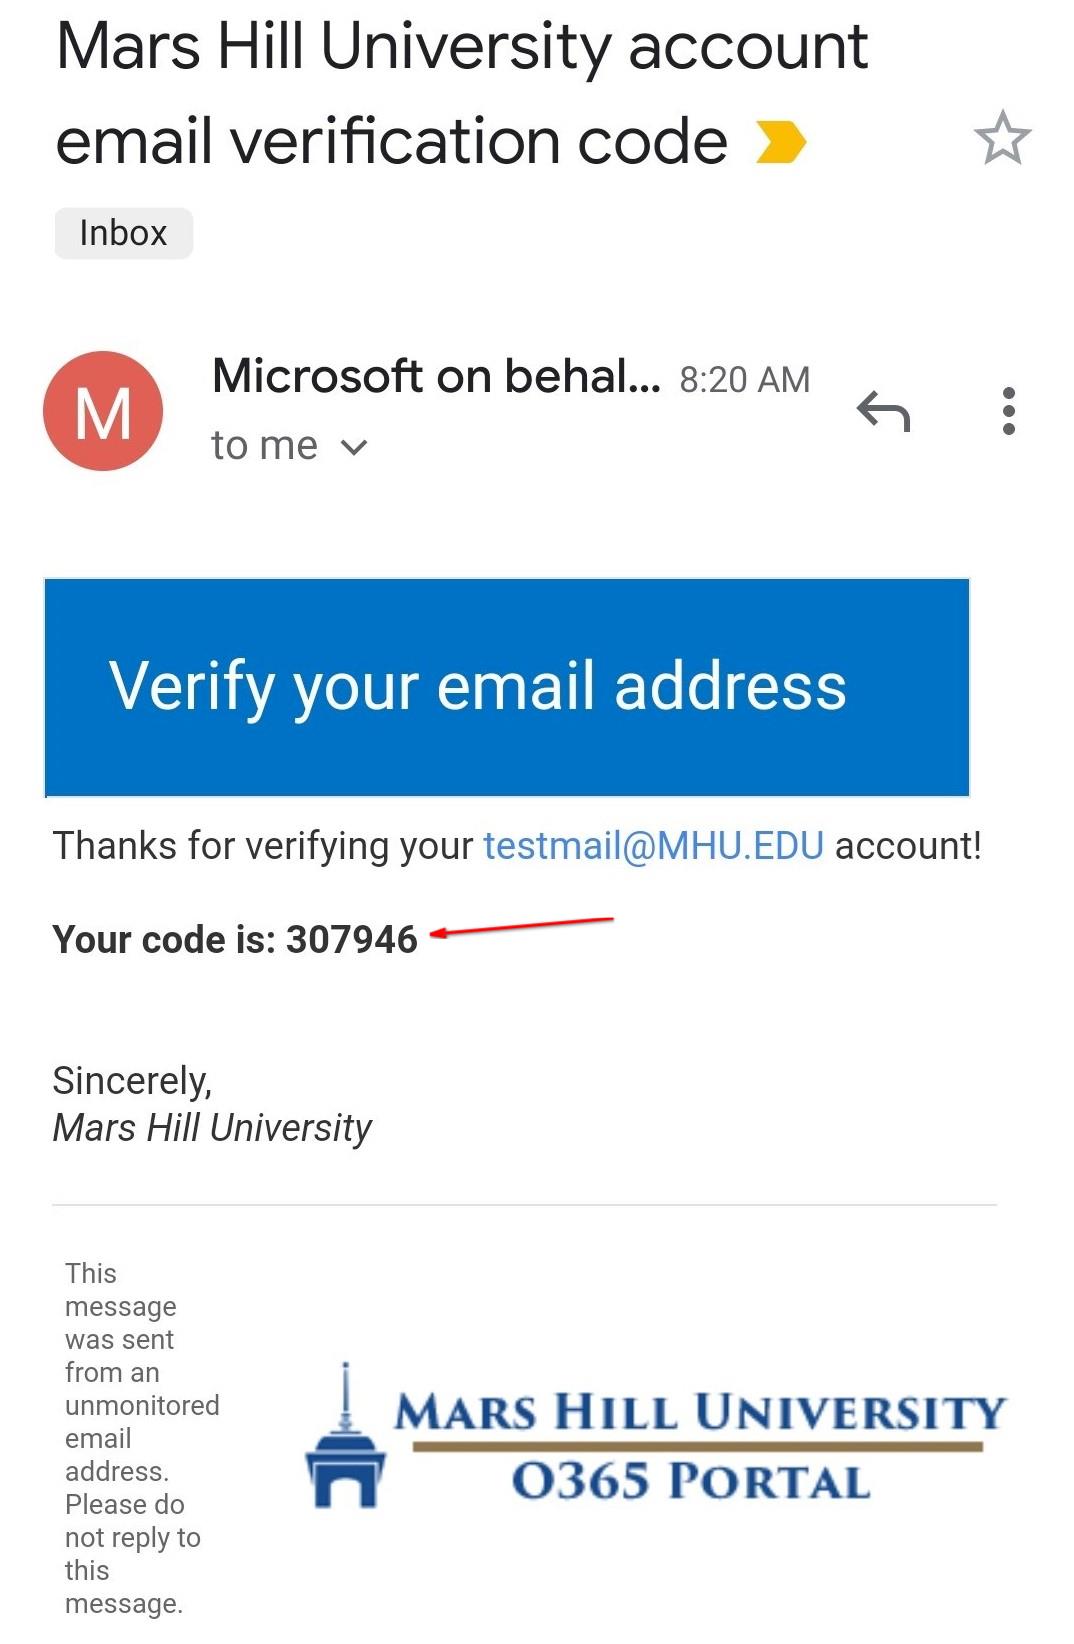
- .Enter that code in the input box and click “Next”
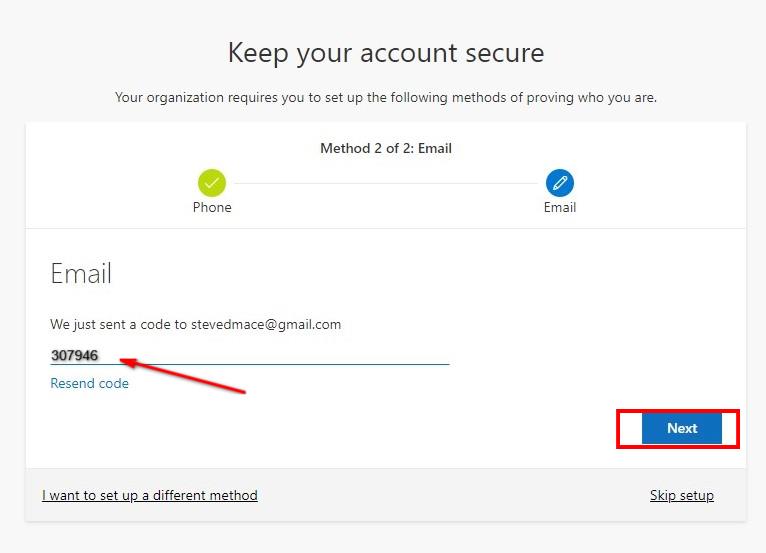
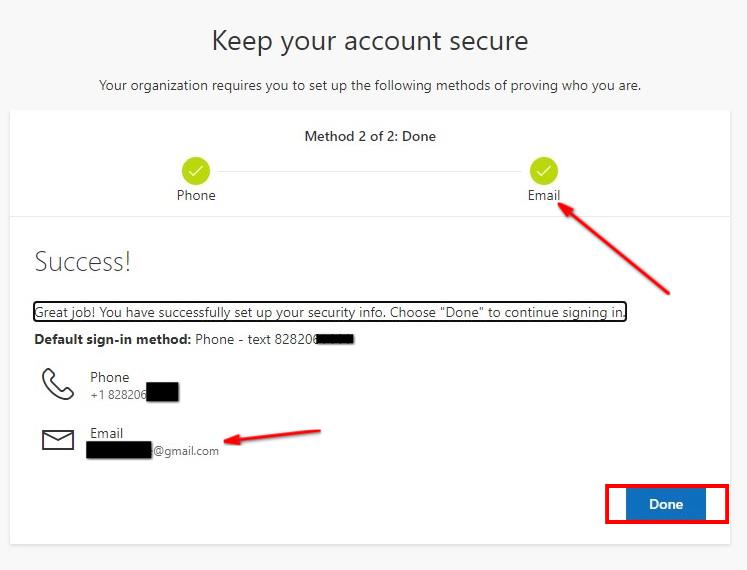
- The green check verifies that your alternate email is now configured as an authentication method. Click the “Done” button to complete this process.
(This ends the basic instructions for setting up authentication methods)
Ways to keep your account secure or change your settings
It is important that you keep your security information updated if there are any changes to your cell phone number or alternate email address.
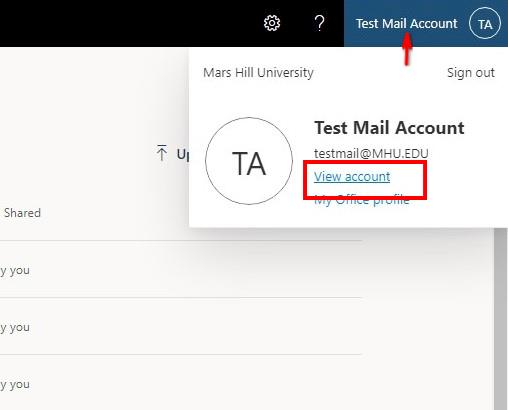
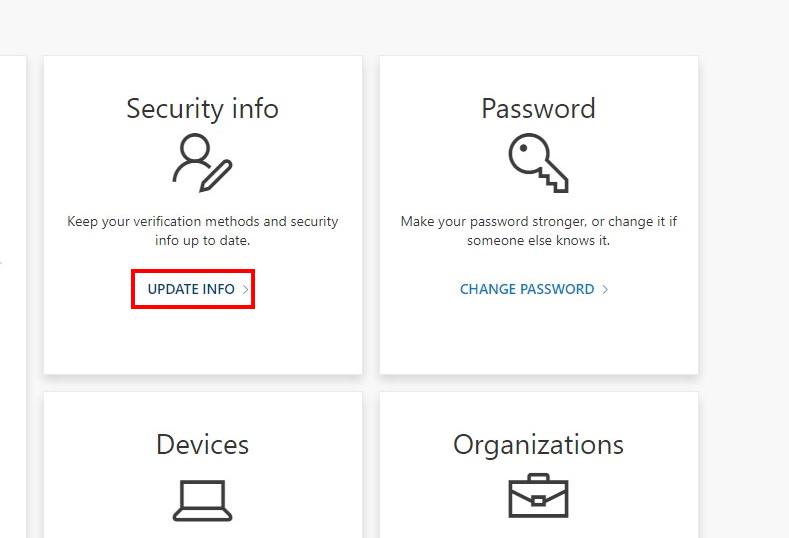
To modify your information click your name in the upper right corner of the O365 portal and select “View account“
View or change your Security Information
On the Security Info tile select “UPDATE INFO“
If you have already configured any authentication methods you will always be prompted to verify when viewing or changing your security information.
In this example a verification code was sent by text. Enter that code and click “Verify“

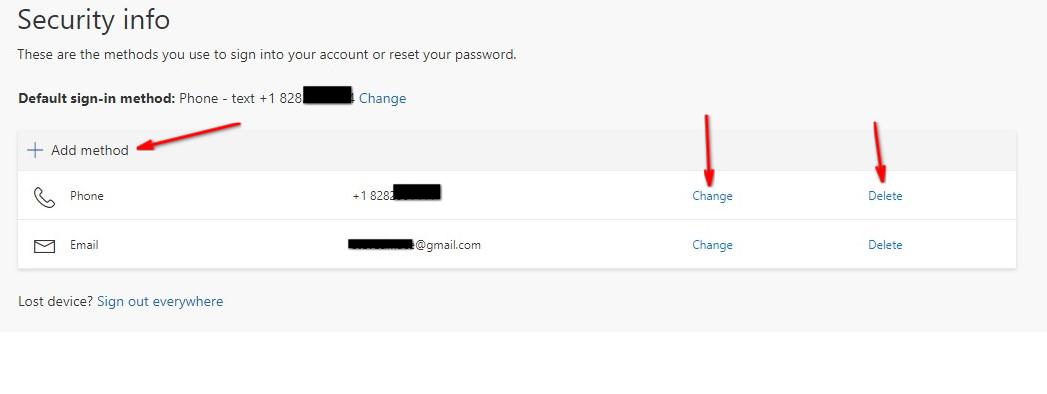
This screen displays your security authentication methods. You may change, delete or add methods as indicated by the arrows.
Security info screen
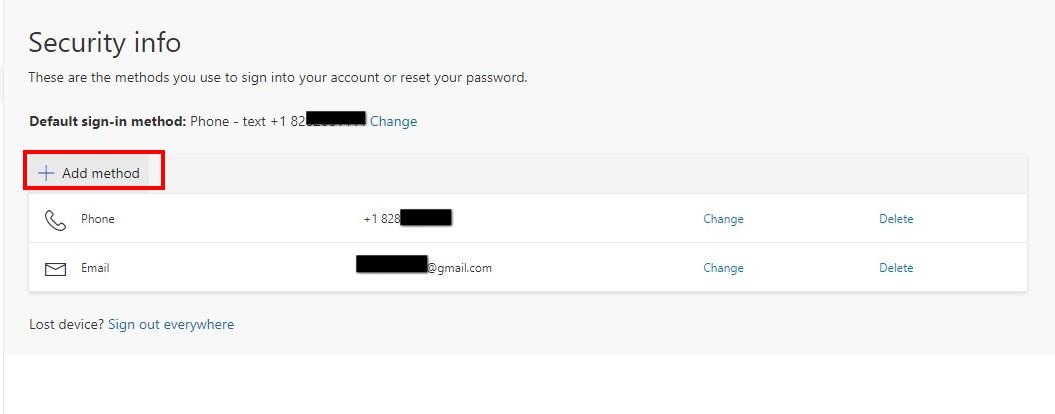
Click the “Add method” to add and authentication method. The following instructions will go over adding “Security questions” as an authentication method.
Adding an authentication method
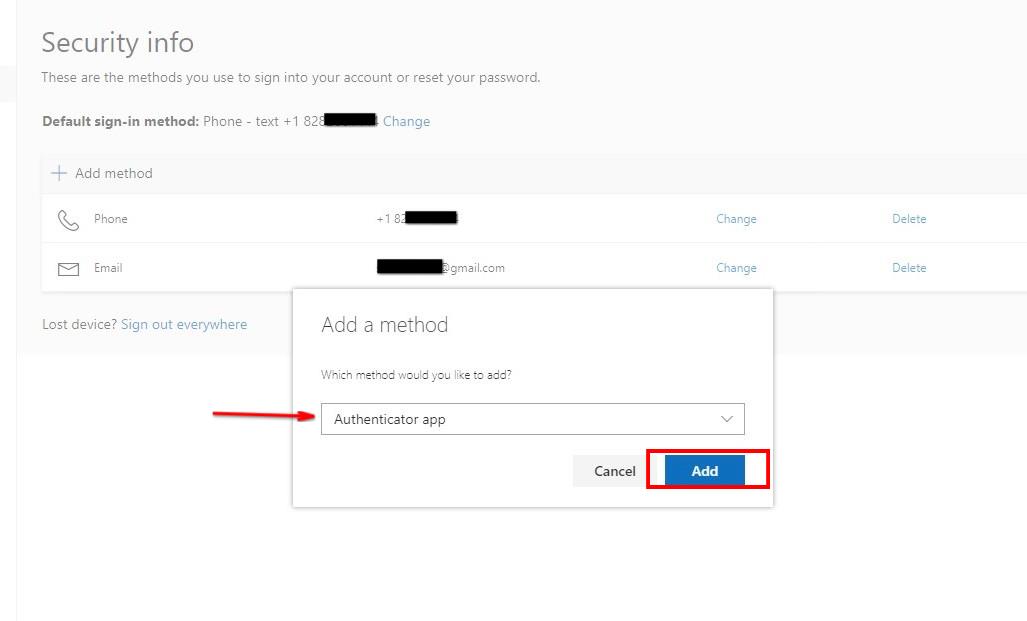
Select the drop-down to display accepted methods. Follow this link for more detailed instructions on using the Microsoft Authenticator app.
Microsoft Authenticator App
To use the Microsoft Authenticator App select it from the drop-down and click “Add“
If you do not have the app installed on your smart phone/tablet click the “Download now” link for instructions. Installing the app is not covered in this guide.
Add your MHU.EDU account to the Microsoft Authenticator app on your device. Once that is complete click the “Next” button.
Scan this QR code with your smart device. Once that is done click the “Next” button to verify.
Click the MHU image at the upper left of your screen to exit your account settings.
Return to the MHU O365 Portal
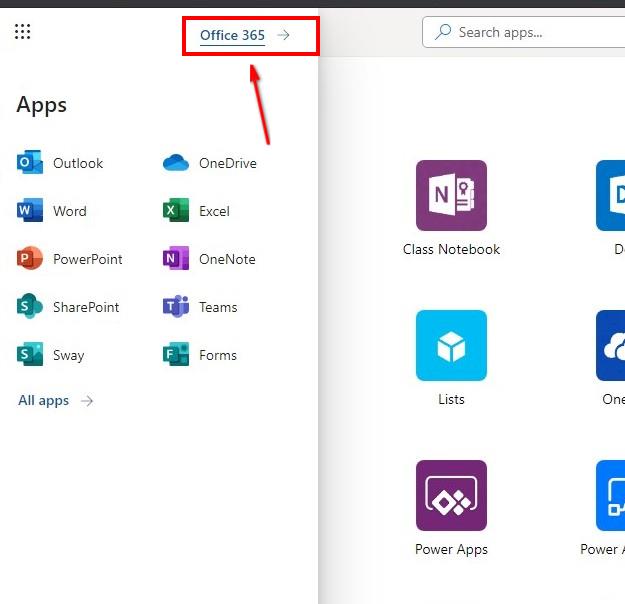
This will take you to the “My Apps” screen. To return to the O365 portal click the “Office 365” link in the upper left.
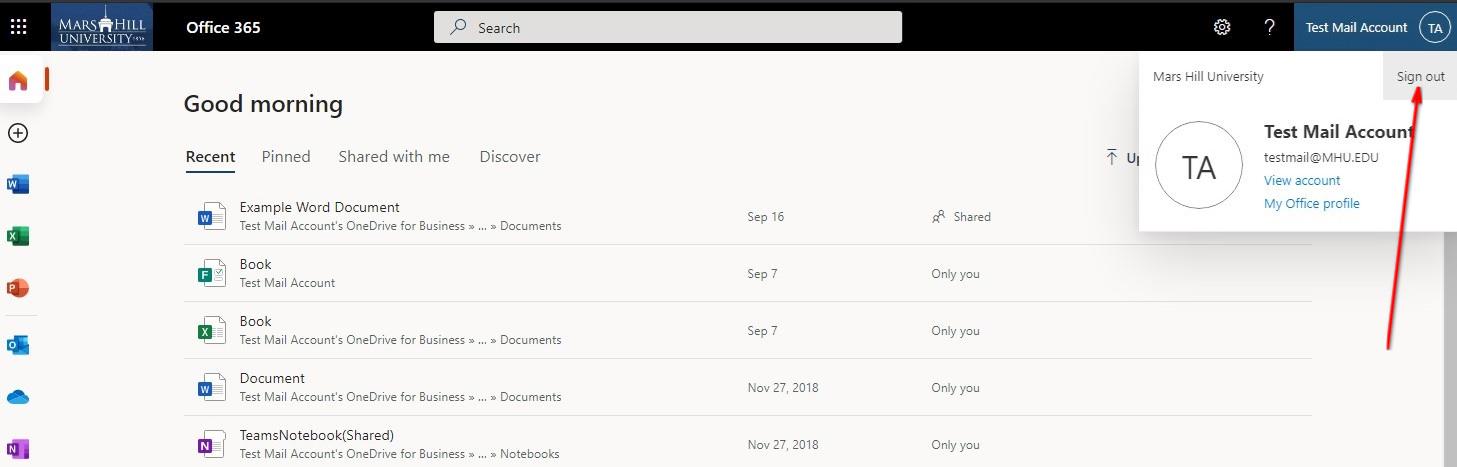
Now you are back to the MHU O365 portal. Always be sure to sign out of your account when done.
[end of instructions]