YOU MUST SUBMIT A REQUEST TO THE MHU ITS DEPARTMENT TO PLACE YOUR ACCOUNT IN OUR VPN ALLOWED LIST BEFORE THESE STEPS WILL WORK
Create a VPN profile
Before you can connect to a VPN, you must have a VPN profile on your PC
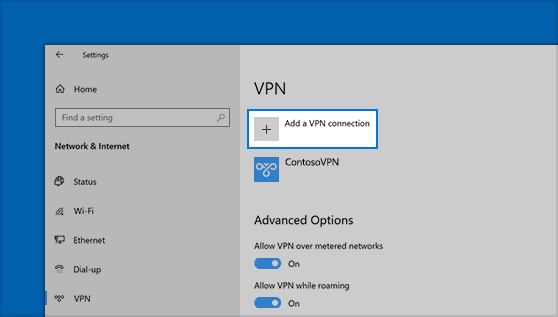
Select the Start button, then select Settings > Network & Internet > VPN > Add a VPN connection.

Create a VPN profile:
Select the Start button, then select Settings > Network & Internet > VPN > Add a VPN connection.
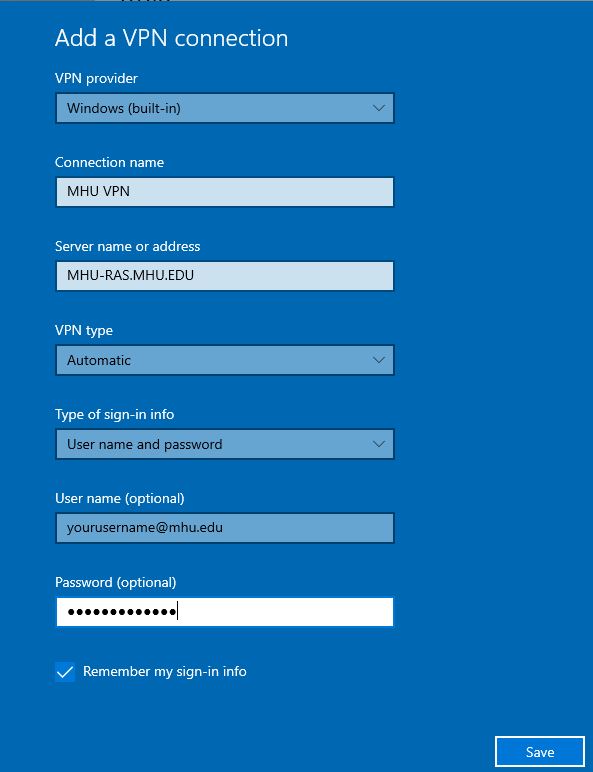
- In Add a VPN connection, do the following:
- For VPN provider, choose Windows (built-in).
- In the Connection name box, enter a name you’ll recognize (for example, MHU VPN).
(This is the VPN connection name you’ll look for when connecting) - In the Server name or address box, enter MHU-RAS.MHU.EDU
- For VPN type, choose Automatic
- For Type of sign-in info, choose User Name and password
- In the User name field, enter your full MHU email address
- In the Password field, enter your MHU password
(If you later change your MHU password you will have to update it here) - This is how your settings should look

- Select Save.
Connect to MHU via VPN
When you have a VPN profile, you’re ready to connect.
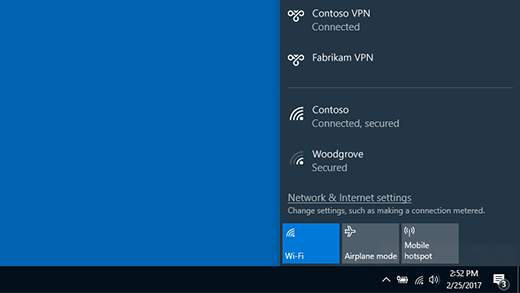
- On the far right of the taskbar, select the Network icon
- Select the VPN connection you created in the previous steps, then do either of the following depending on what happens when you select the VPN connection:
- If the Connect button displays under the VPN connection, select Connect.
- If the VPN section in Settings opens, select the VPN connection there, then select Connect.
- If you’re prompted, enter your username and password or other sign-in info.
When connected, the VPN connection name will display Connected underneath it. To see if you’re connected to the VPN while you’re doing things on your PC, select the Network icon on the far right of the taskbar, then see if the MHU VPN connection says Connected.

To disconnect from VPN select the Network icon, click the MHU-VPN profile and click “Disconnect”
This concludes the Windows 10 VPN instructions.
