YOU MUST SUBMIT A REQUEST TO THE MHU ITS DEPARTMENT TO PLACE YOUR ACCOUNT IN OUR VPN ALLOWED LIST BEFORE THESE STEPS WILL WORK
This article will describe how you can configure L2TP/IPsec VPN on MAC OS X and connect to the MHU network.
Prerequisites
- Mac OS X
- Access to your Mac OS X with admin or a user that has administrator permissions
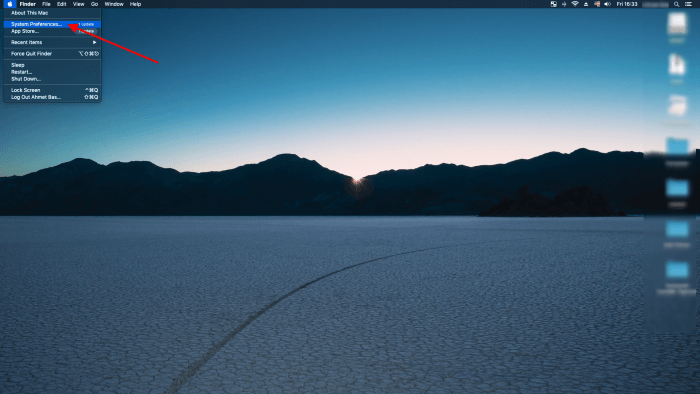
Click on the Apple icon in the left top corner and click “System Preferences”
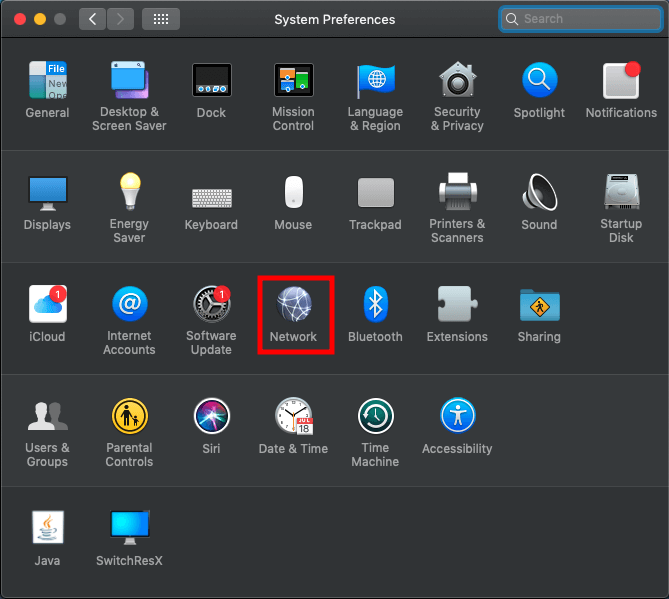
Click on “Network”
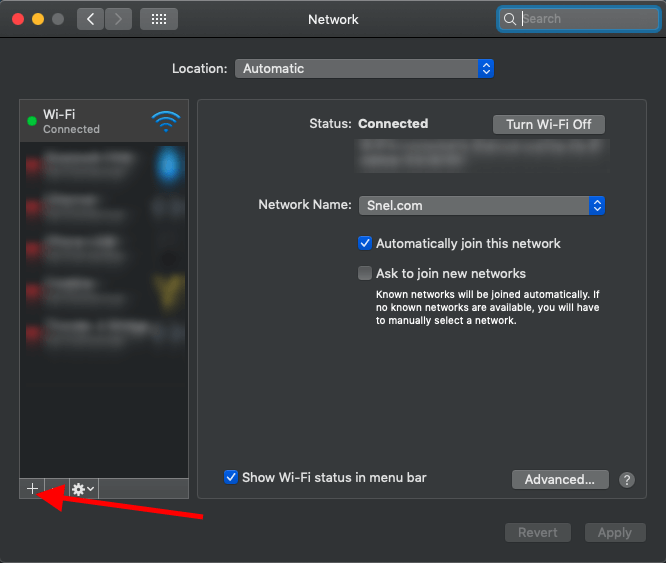
Click on + to add a new network interface
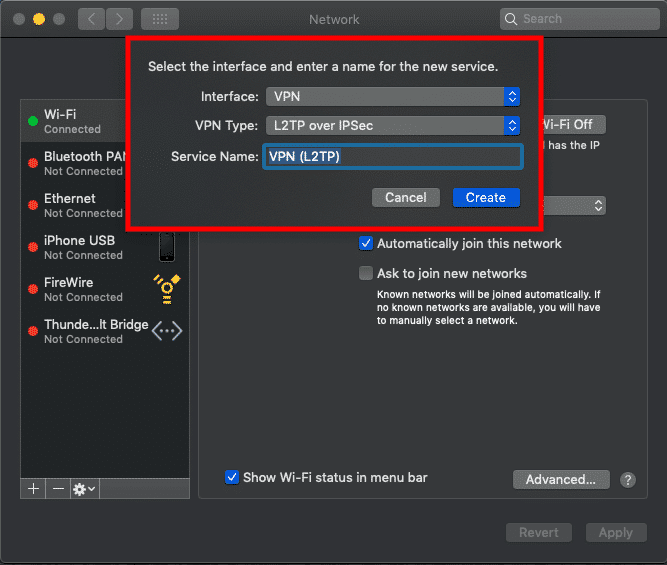
- Select VPN via the Interface dropdown list
- Select “L2TP over IPsec” as VPN-type
- The Service Name can be anything you want. I suggest you enter something descriptive such as MHU-VPN
- Click “Create”
Select VPN (L2TP) (or MHU-VPN if you used that name) in the left menu.
- Leave the Configuration setting at “Default”
- Server Address: MHU-RAS.MHU.EDU
- Account Name: (enter your MHU email address)
-
Check “Show VPN status in the menu bar”
- This will display a small VPN icon on the right side of the menu bar. You will be able to select this icon and quickly connect/disconnect VPN sessions without having to go into System Preferences
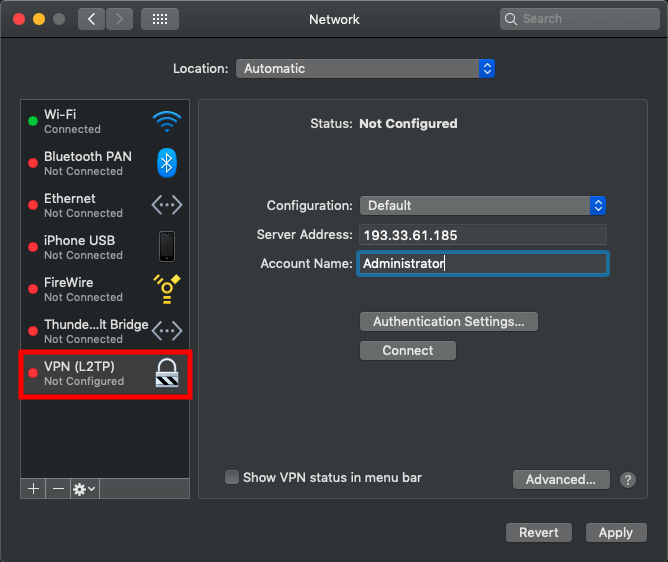
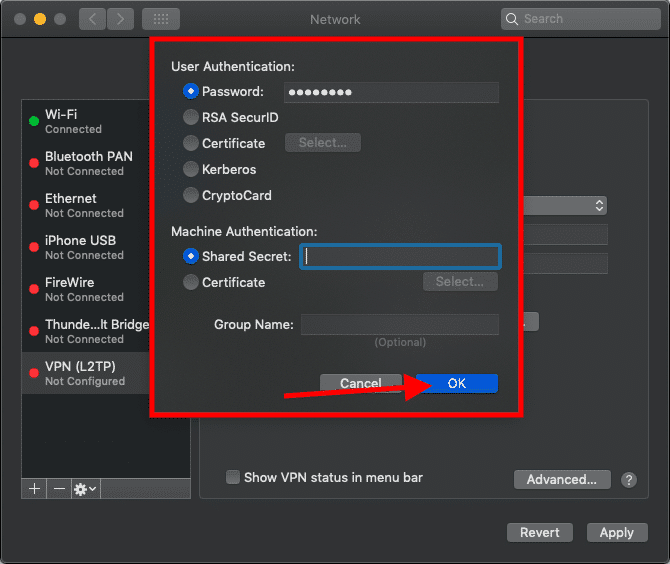
Click on “Authentication Settings…”
- Enter your MHU password in the password field
- Enter mhuvpn in the Shared Secret field
- Click “Ok”
Remember – If you later change your MHU network/email password, you will need to update it here as well!
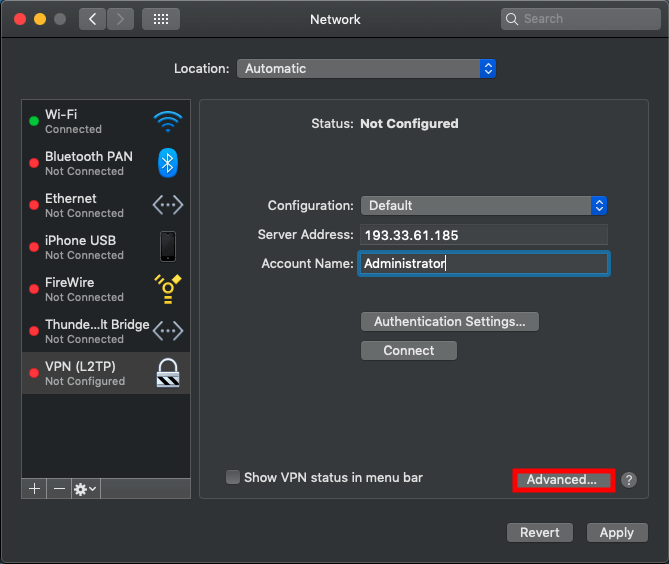
Click on “Advanced…”
Check all three of the options under “Session options”
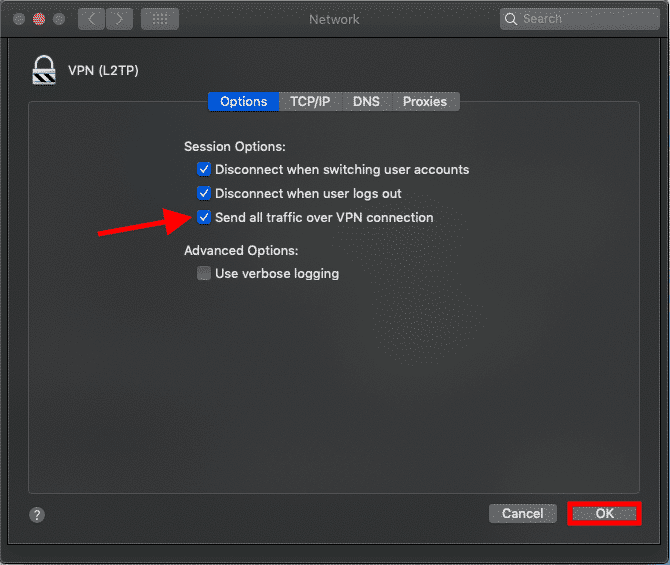
Click “Ok” to save
This will take you back to the Network settings. Be sure to click “Apply” to save your VPN settings
The Mac OS X VPN client is now configured and ready to use.
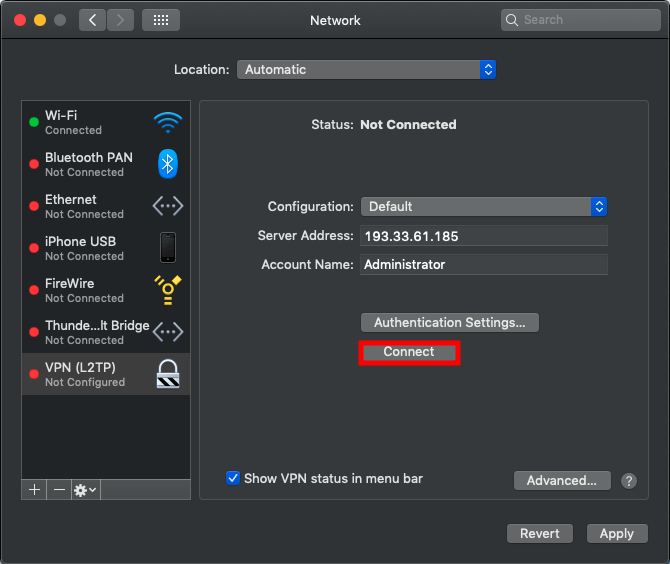
Click on “Connect” to make a connection with your VPN server.
We have made a successful connection to the MHU VPN server via VPN.
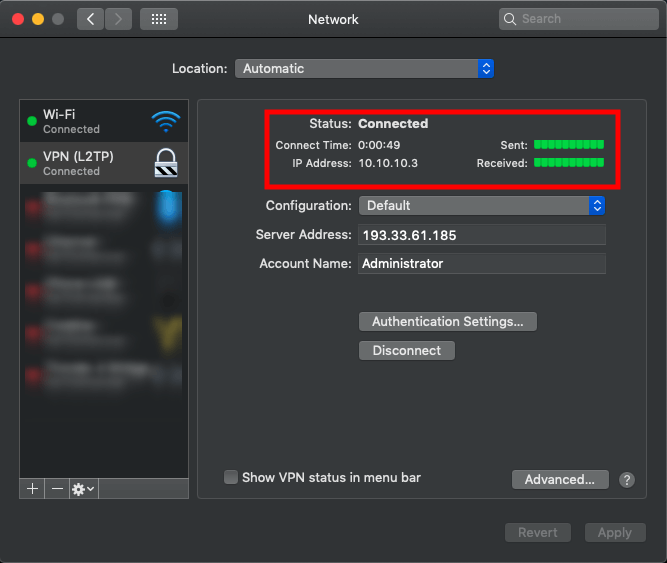
When you are finished using the VPN connection to MHU be sure to click “Disconnect” to terminate the session.
This concludes the VPN instructions.